

Moving the FM-6: Why Garage Gyms Must Evolve (And How to Survive the Move)
By Drew | Iron and Lime Fitness
Last Updated: January 2026
Iron and Lime Fitness is independent and supported by readers. We may earn a small commission at no cost to you if you buy through an affiliate link.
If you’ve followed Iron and Lime for any amount of time, you already know the rule: equipment doesn’t move without a reason.
This wasn’t a spur-of-the-moment shuffle or a bored Saturday project. Relocating the FM-6 was a deliberate decision tied directly to how I train now, how this space actually gets used day to day, and what’s coming next for the gym.
This also isn’t a polished tutorial. It’s context. Because if you build a garage gym long enough, you eventually reach a point where you either adapt the space, or the space starts dictating how you train. And when that happens, something has to give.
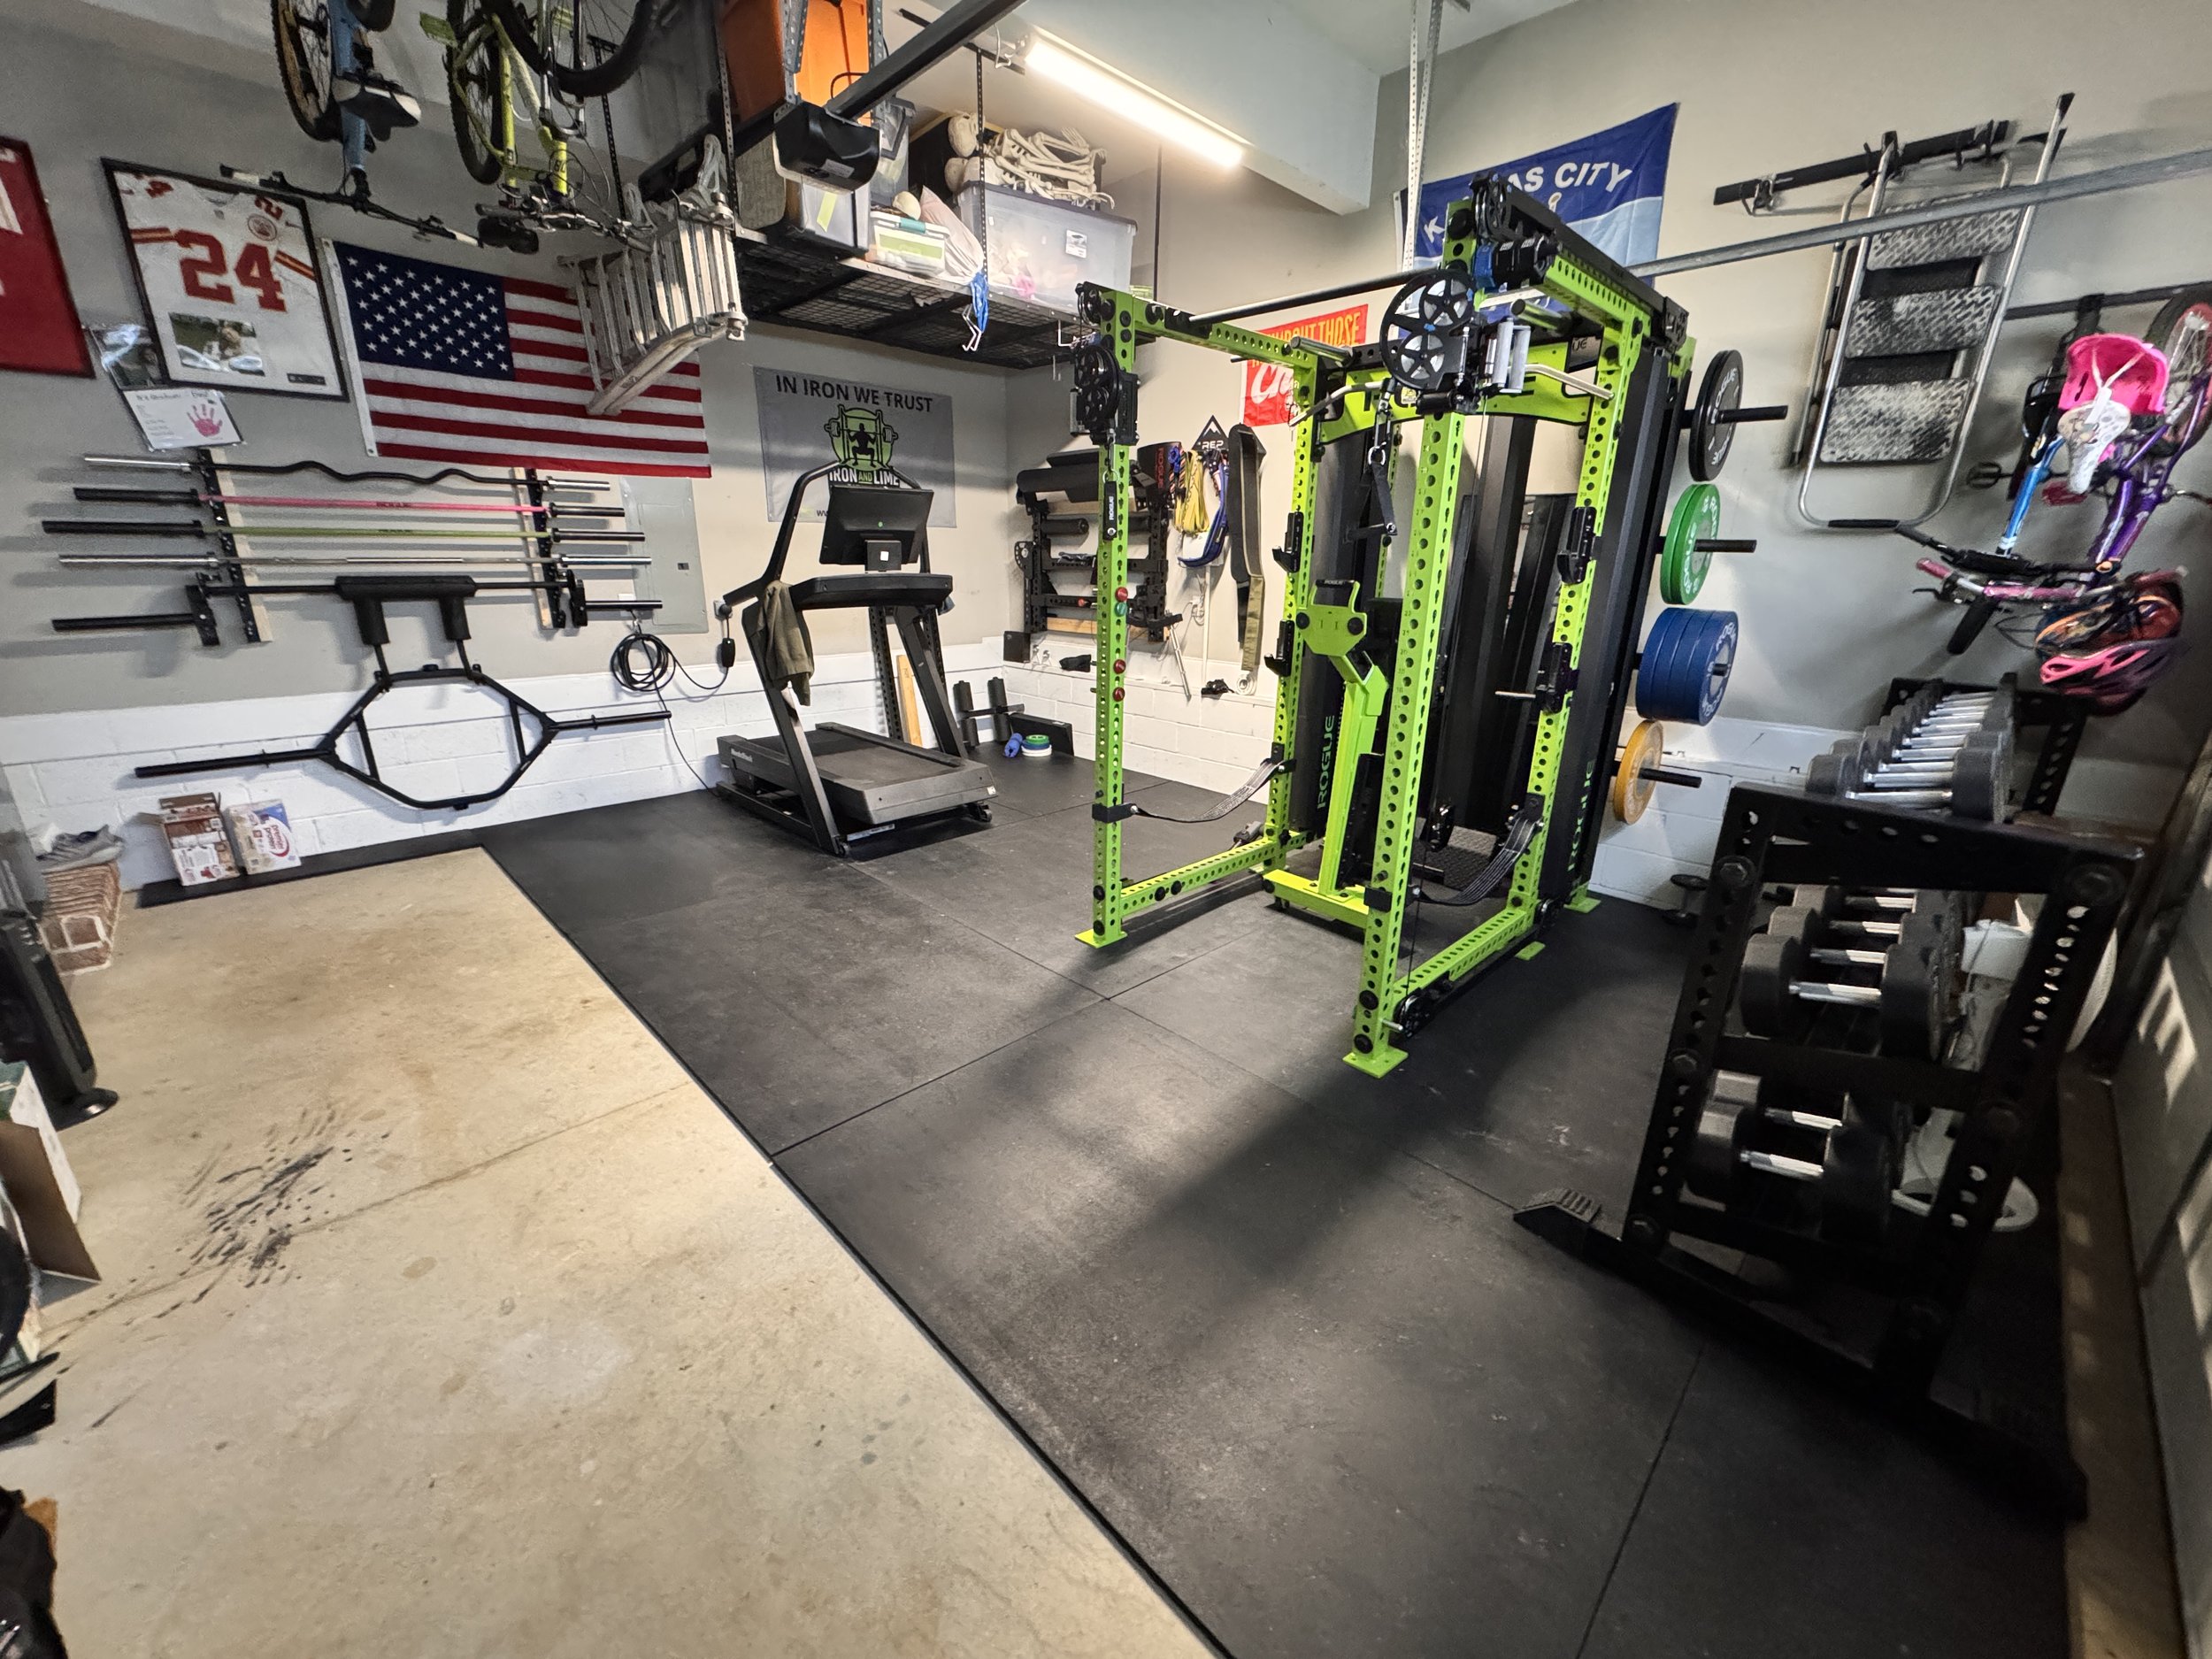
Why the FM‑6 Had to Move
The FM-6 has been a workhorse. It did exactly what it was supposed to do, and it did it well. No failures. No regrets. No buyer’s remorse.
But as my training shifted and the gym evolved, the layout stopped being optimal.
A major driver behind this move was preparing for two upcoming additions: the Indy Dual Functional Trainer and the CTM-1. I’ll be honest, there was a selfish element to this decision. Rogue equipment holds its value extremely well, and knowing the FM-6 was likely going to sell, I wanted to see how the space would function with a six-post Indy setup and the CTM-1 in place.
Not on paper. Not in Rogue’s Gym builder. In real life.
Both of those pieces fit better into a layout that prioritizes clear lanes, fewer bottlenecks, and reduced setup friction. This wasn’t about replacing something because it failed. It was about alignment. The gym needed to function better for how I actually train now, not how I trained two years ago.
Here’s the reality check: garage gyms aren’t static. They’re living systems. Once you stop treating them like showroom displays and start treating them like infrastructure, moving 800+ pounds of steel starts to make sense.
If you want to see the full process, check out the YouTube video linked below. The article gives you the “why.” The video shows you the “how,” including the parts that didn’t go according to plan.
Check out the Youtube video below
Moving Heavy Equipment: The Plan vs. Reality
There’s how equipment moves in marketing videos, and then there’s how it moves in a real garage, with real constraints, uneven floors, limited clearance, and tools you already own.
We decided early on to move the FM-6 mostly as a single unit. That meant stripping weight, clearing surrounding equipment, and figuring out how to lift and roll something that is both extremely heavy and extremely awkward.
I had help from my wife and my father-in-law, which made this possible in one session. Lesson number one: extra hands matter more than perfect tools.
1. The Roller Experiment (Fail)
I used furniture rollers from Amazon for this move. You can find them here. I’ll be straight with you: they technically worked, but they were living on borrowed time.
Under this kind of load, they bent and partially collapsed halfway through the move. Would I rely on them again for something this heavy? Probably not. A pallet jack or a more robust jack setup would be the superior option.
That said, the rollers got us far enough that we could finish the move with some improvisation. That’s garage gym reality. You adapt, you reassess, and you keep moving.
2. The Jack Method & The "Weight Peg" Hack
The original plan involved a standard car jack. This one here. That plan did not survive contact with reality without some adjustments.
One thing that worked surprisingly well was inserting a weight peg into a lower hole on the rack and using that as the lift point, paired with a block of wood for stability. It was significantly easier than trying to get a jack fully under the frame.
It wasn’t elegant. It wasn’t fast. But it was effective.
Important note: always place a thin piece of wood between the jack and your rack to protect the powder coat. You’ll thank yourself later.

3. Straps, Leverage, and Finesse
The Bells of Steel straps were the quiet heroes of this move. You can find those here: Bells of Steel Hydra Safety Straps and the Manticore Safety Strap Connectors. They made lifting and stabilizing the rack safer and more controlled, especially once fatigue set in.
By the time we were positioning the FM-6 into its final spot, the rollers were bent, energy was low, and precision mattered more than speed. This is where a dead-blow mallet earns its keep, find it here. You need to make micro-adjustments without damaging the finish or the floor.
This is the part no one shows in highlight reels: the lateral nudges, the tiny corrections, the “just one more inch” moments. This is where most garage gym moves are won or lost.
How to Cut 3/4" Stall Mats (Without Losing Your Mind)
Once the equipment was in place, it was time for the irreversible part: cutting the stall mats. This is where a lot of gym owners get nervous, but it’s manageable if you approach it correctly.
The Tool List
These will be crucial to getting the mats cut:
Guide board: Any solid straight edge works. Trim board is perfect.
Knife: A Husky utility knife (Like this one here)that allows a full half-inch blade extension.
Protection: A sacrificial board placed under the mat.

The Process
1. Flip it: I prefer cutting from the flat side of the mat. It’s easier to mark measurements accurately, and your guide stays put.
2. Set the guide: Lay down your trim board to keep the cut straight.
3. Score, don’t slice: Do not try to cut through in one pass. Light pressure is your friend.
4. Repeat: Go over the same groove four or five times. Take your time. Jumping grooves creates ugly edges and more work.
5. Snap: Once the cut is deep enough, you’ll feel the bottom texture (the little Lego pattern) start to give. At that point, remove the guide and bend the mat. It should snap cleanly.
My first cut wasn’t perfect, and that’s intentional. By the fourth cut, the process felt much smoother. That learning curve is normal.
What This Move Really Represents
This wasn’t about downsizing or upgrading for the sake of novelty. It was about making the gym serve the training instead of forcing the training to work around the gym.
If you train at home long enough, you’ll hit this point too. The question isn’t whether change is needed. It’s whether you’re willing to make it.
Strong gyms evolve. Strong training environments reduce friction. And sometimes that means moving an entire rack and cutting into stall mats you swore you’d never touch.
That’s not a failure. That’s ownership.
Shop This Project
Furniture Rollers (Use with caution on heavy racks!)
Husky Utility Knife (Essential for stall mats)
Bells of Steel Hydra Safety Straps and the Manticore Safety Strap Connectors.
Let's Talk
If you've got questions about fitness, being a dad, the Army, or if the Rogue FM-6 makes sense for your situation, drop a comment below or message me on Instagram (@ironandlimefitness) or Facebook. I reply to everyone because this stuff matters-your money, your training, your goals.
Support the Garage Grind:
This is a family-run operation. I do the videos, the editing, the writing, the filming, the socials, the marketing, the blogging, the website, and obviously the training-all while balancing a full-time job and three kids who just want to hang out.
If this review helped you make a decision or gave you information you couldn't find anywhere else, hitting Like and Subscribe is the best way to keep this thing going. No ads, no sponsors, no BS-just real reviews from a real gym.
Let's train hard and stay consistent.
Strength for Life. Fitness for All.
- Drew
Iron & Lime Fitness
P.S. - If you end up moving your power rack or experiencing the joy of cutting stall mats, hit me up, would love to hear others experience and how this article may have helped.
Strength for Life. Fitness for All.
Barbells and Balance Things:
Watch the full video review on our YouTube channel
Making Room for the Rogue Indy Dual Functional Trainer: Moving the Rogue FM-6 & Cutting Stall Mats
More Articles here:
American Barbell 10-Sided Urethane Dumbbells Review: Commercial Luxury or Financial Mistake?
Here's Why I Wouldn't Buy The Rogue FM-6 Again: Rogue FM-6 Long-Term Review
Rogue Mutant Metals Ultimate Dip Attachment Review (1 Year Later): Is It Really Worth $365?
Rogue Kabuki Transformer Bar Review
Rogue Manta Ray Adjustable Bench Review
Rogue FM-6 Twin Functional Trainer Review
American Barbell Dumbbell Set and Rack Review
“Best Budget Gear for Building a Garage Gym”
Bells of Steel Safety Straps Review: A Perfect Fit for the Rogue FM-6
Train hard. Live bold. Stay lime.